25 Small House Floor Plans Ideas for Efficient Living
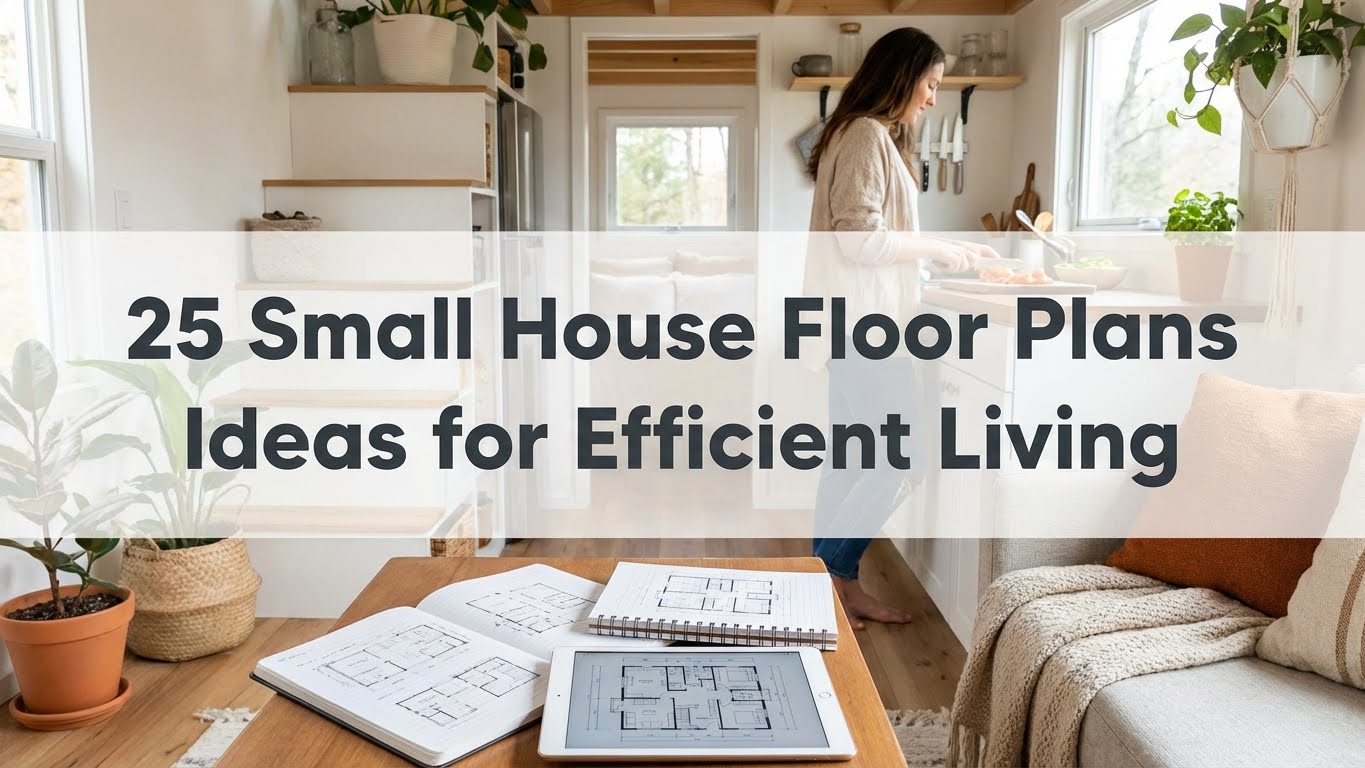
Ever dreamed of living large in a cozy, efficiently designed space? Small house floor plans are gaining popularity because they maximize comfort while minimizing clutter, making everyday living more manageable and enjoyable.
In this article, you’ll explore a variety of innovative and practical floor plan ideas that cater to different lifestyles and preferences. Whether you’re seeking open-concept layouts, clever storage solutions, or multi-functional rooms, these ideas will inspire you to transform your small space into a beautiful, functional home that fits your needs perfectly.
1. Open-Concept Living Areas to Maximize Space
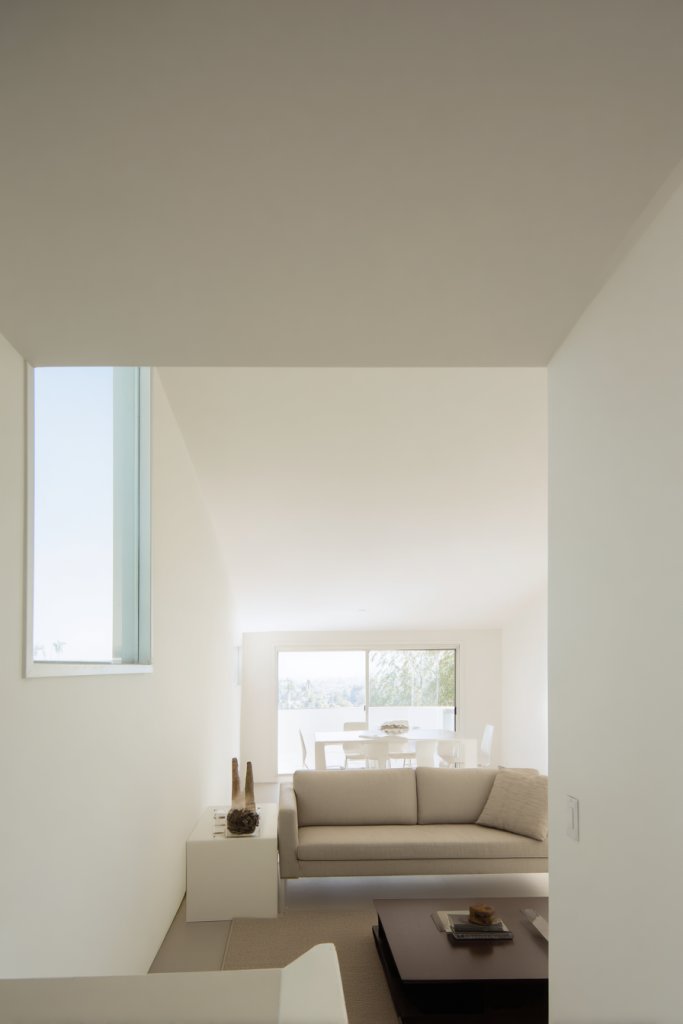
Living in a small home often feels like you’re constantly battling to find enough space to breathe. The cramped feeling can make even the coziest moments seem claustrophobic. Many wish for a way to make their home feel larger without knocking down walls or adding extensions. Open-concept layouts promise to turn tiny spaces into airy retreats, but how?
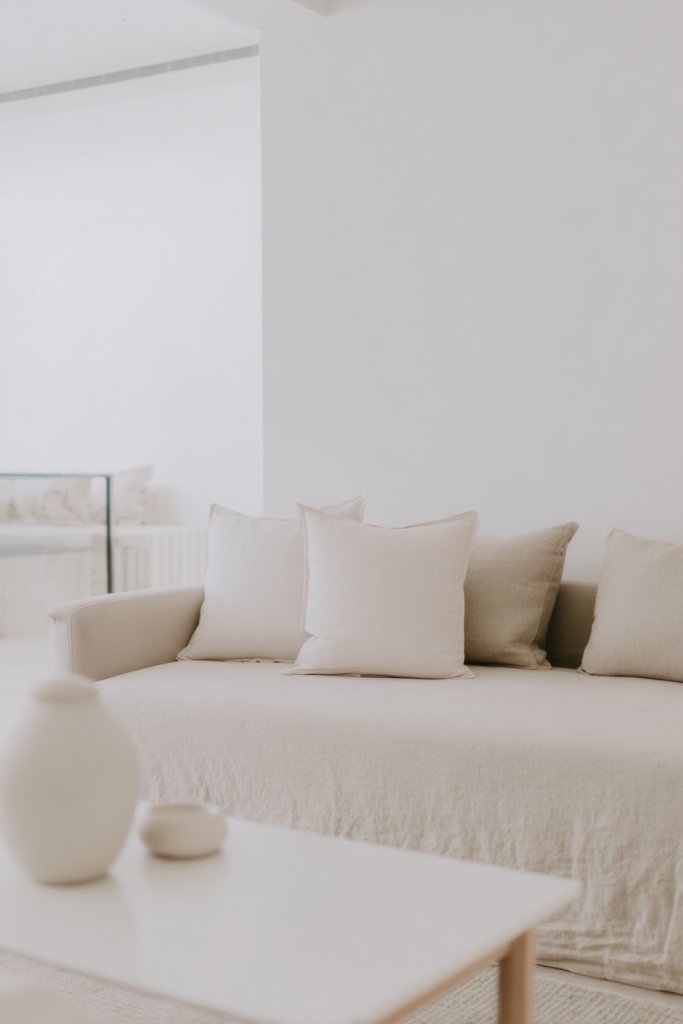
Imagine walking into a room where the living, dining, and kitchen zones flow seamlessly together, with no walls blocking the view. Light floods in through large windows, bouncing off neutral-toned walls that seem to expand the space. Soft fabrics and smooth textures create a welcoming environment, while clever furniture placement keeps everything functional. It’s a space that feels much bigger than its actual footprint.
This concept adapts well to modern, minimalist styles with sleek, low-profile furniture or cozy farmhouse vibes with warm woods and soft textiles. For seasonal changes, you can add layered rugs or throws to create warmth in winter or a breezy feel in summer. You can also zone areas with subtle changes in flooring or ceiling treatments to define spaces without walls. The key is balancing openness with designated zones for comfort.
Start by removing non-structural walls or opting for an open-plan layout if building from scratch. Focus on furniture that’s multi-purpose, like a sectional sofa or extendable dining table. Use strategic lighting—recessed lights, sconces, or track lighting—to highlight different zones. Keep clutter hidden in integrated storage to maintain a clean look. Choose light-colored paint and reflective surfaces to amplify natural light and give the illusion of more space.
Add personality with textured textiles, colorful cushions, or statement rugs that define each zone subtly. Open shelving instead of closed cabinets provides an airy feel and displays personal decor items. Incorporate movable furniture pieces for flexibility during gatherings or quiet nights. Use different lighting layers to change the ambiance from lively to relaxing, matching your mood.
An open-concept design transforms a small home into a versatile, welcoming space. It’s all about creating a flow that invites natural movement and light. With the right choices, your tiny home can feel expansive and stylish, like a boutique hotel suite. Ready to embrace the open plan and enjoy a spacious lifestyle? Your bigger, brighter home awaits.
2. Multi-Functional Furniture for Small Spaces
Small spaces often force you to choose between style and functionality, leaving you with cramped, cluttered rooms. It’s frustrating when furniture takes up valuable space but offers little in return. The solution? Multi-functional furniture that does double duty without sacrificing style. It’s like having a secret weapon against tiny living.
Picture a sleek sofa that transforms into a guest bed overnight, or a coffee table that extends into a dining surface. Think of a wall-mounted fold-down desk tucked into a corner, ready to host your laptop or serve as a craft station. These pieces blend seamlessly into your decor, with hidden compartments and clever mechanisms that keep your space tidy. It’s furniture that’s as versatile as your needs.
Choose minimalist designs for a modern look or vintage-inspired pieces for warmth. For seasonal use, select furniture with removable or replaceable covers to switch up the style easily. Larger apartments can incorporate sectional sofas with storage underneath, while studio dwellers benefit from fold-out beds and collapsible tables. The goal is flexibility, so your furniture adapts with you.
Start by identifying your biggest space challenges—extra seating, sleeping space, or dining options. Search for furniture with built-in storage or convertible features, prioritizing quality and ease of use. For example, pick a sofa with drawers underneath or a wall bed with a fold-away desk. Measure your space carefully to ensure smooth operation and comfortable movement. Consider DIY modifications or professional assembly for complex pieces.
Personalize your furniture with removable covers, cushions, or decorative hardware to match your style. Use color accents or textured fabrics to add visual interest. Incorporate small accessories like modular shelves or stackable storage bins that can be tucked away when not in use. Creating a cohesive look with your decor makes your multi-functional pieces feel intentional and stylish.
Multi-functional furniture empowers you to make the most of every inch with minimal clutter. It transforms your home into a flexible, efficient space that adapts to your lifestyle. Whether hosting guests or enjoying quiet nights, these pieces keep your home feeling spacious and organized. Ready to upgrade your furniture game and live smarter? The possibilities are endless.
3. Vertical Storage Solutions to Free Up Floor Space
Clutter is the enemy of small spaces, turning tidy rooms into chaos zones in no time. Finding enough storage often means sacrificing precious floor area, making your home feel smaller. Vertical storage solutions promise to reclaim that lost space by going up—literally. It’s the smart way to keep things tidy without sacrificing style.
Imagine tall shelving units reaching the ceiling, filled with baskets, books, or decorative boxes. Wall-mounted cabinets and floating shelves create space for everything from kitchen essentials to personal keepsakes. Hanging organizers and hooks keep everyday items within reach, without cluttering your surfaces. The result is a sleek, organized environment that feels open and airy.
Vertical storage adapts to various decor styles—industrial pipe shelves for an urban look, or minimalist, seamless cabinetry for a clean aesthetic. In small kitchens, wall-mounted racks free up counter space. In bedrooms, tall wardrobes with multiple compartments maximize closet capacity. Seasonal or special-use items can be stored in high shelves or under-utilized wall niches, keeping everything accessible yet out of sight.
Start by assessing your storage needs and available wall space. Install sturdy shelving brackets and choose materials that match your decor—wood, metal, or composite. Use baskets or labeled bins for organization, especially for smaller items. Wall-mounted cabinets require proper anchors and level installation; don’t skimp here. Consider adjustable shelves to customize storage height. Regularly declutter to keep vertical spaces functional and tidy.
Add decorative elements like textured baskets or colorful bins to inject personality. Use hooks or pegs for hanging items like backpacks, scarves, or utensils. Incorporate lighting—LED strips or puck lights—to highlight your storage areas and make items easier to find. Personal touches such as framed photos or unique hardware make the storage both functional and fun.
Vertical storage solutions turn your walls into valuable real estate, freeing up floors for living or entertaining. They keep your home organized and visually appealing, proving that smart design can solve space issues elegantly. Once you master vertical storage, small spaces start to feel limitless. Ready to elevate your storage game and organize like a pro? Your clutter-free home is just an install away.
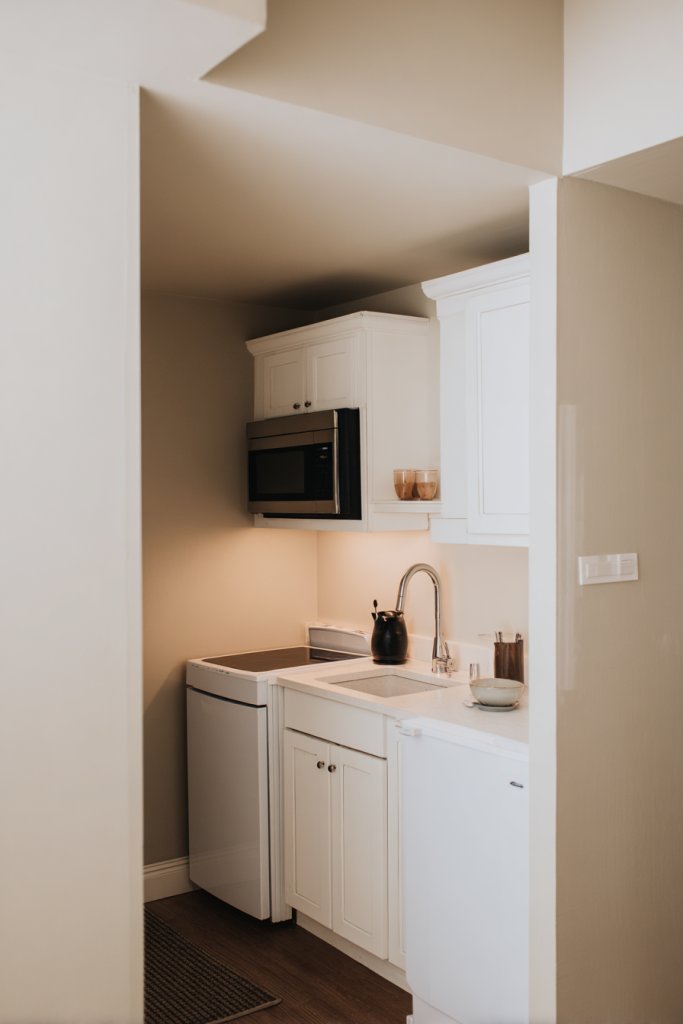
4. Compact Kitchen Layouts with Efficient Workflow
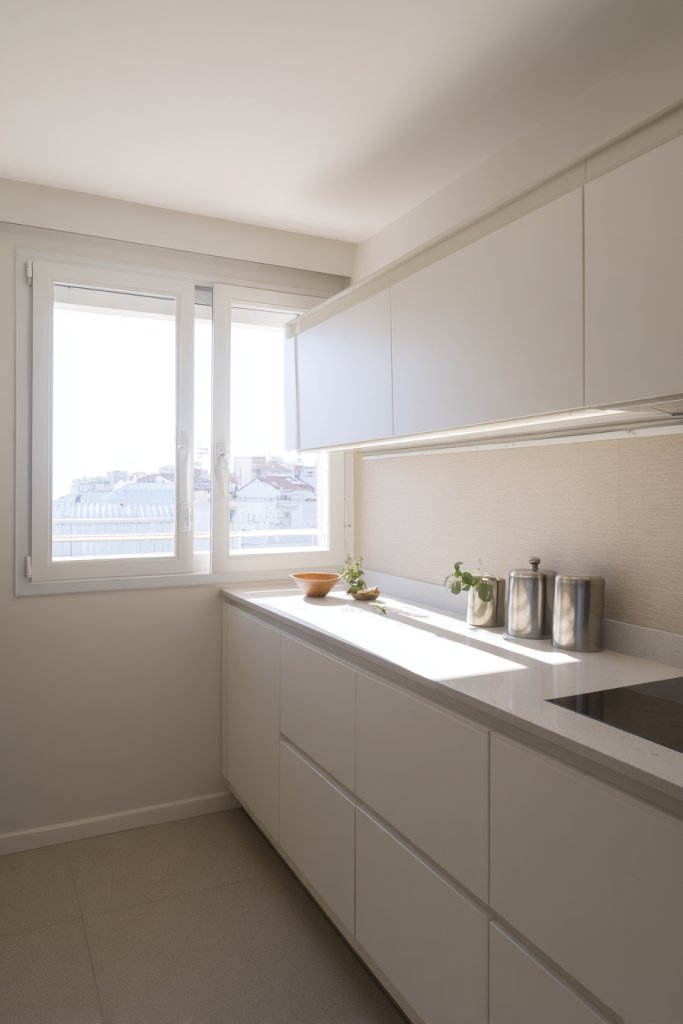
Cooking in a tiny kitchen often feels like a logistical nightmare—cramped counters, limited prep space, and a constant game of moving things around. Who hasn’t wished for a more efficient setup that makes cooking less of a chore? Compact kitchen layouts focus on smart design to maximize every inch for seamless workflow. It’s like having a professional kitchen in a shoe box.
Envision a U-shaped kitchen with appliances tucked into designated zones, so everything is within arm’s reach. Narrow galley kitchens use clever storage solutions to keep clutter hidden, with open shelving and pull-out drawers. Soft, neutral tones and sleek surfaces reflect light, creating an illusion of openness. Small appliances are integrated into cabinetry, and under-cabinet lighting brightens work areas, making cooking feel effortless.
Choose a layout based on your space and cooking habits—U-shaped for multiple cooks, galley for efficiency, or L-shaped for a cozy corner. Incorporate movable carts or island stations to expand workspace temporarily. In seasonal homes, use fold-away counters or retractable tables for versatile use. The key is designing a workflow that minimizes movement and keeps everything you need at hand.
Start by mapping out your kitchen’s footprint and zoning areas for prep, cooking, cleaning, and storage. Select appliances that fit snugly into cabinetry, like slim refrigerators or compact dishwashers. Use vertical storage for pots, pans, and utensils—install hooks or magnetic strips. Choose durable, easy-to-clean surfaces and consider pull-out or soft-close drawers. Proper lighting and good ventilation complete the efficient setup.
Personalize your kitchen with color accents—think vibrant tiles or bold hardware—without cluttering surfaces. Add a fold-down or extendable countertop to increase prep space during busy times. Incorporate a spice rack or utensil organizer to keep essentials within reach. Use decorative yet functional elements like textured backsplashes or patterned flooring to add character.
A well-designed compact kitchen boosts your cooking confidence and saves time. It proves that small doesn’t mean limited—just smartly planned. With the right layout, you’ll enjoy cooking and entertaining without feeling cramped. Ready to upgrade your kitchen into a sleek, efficient hub? The secret is good design and a little creativity.
5. Loft Bedrooms to Save Floor Area
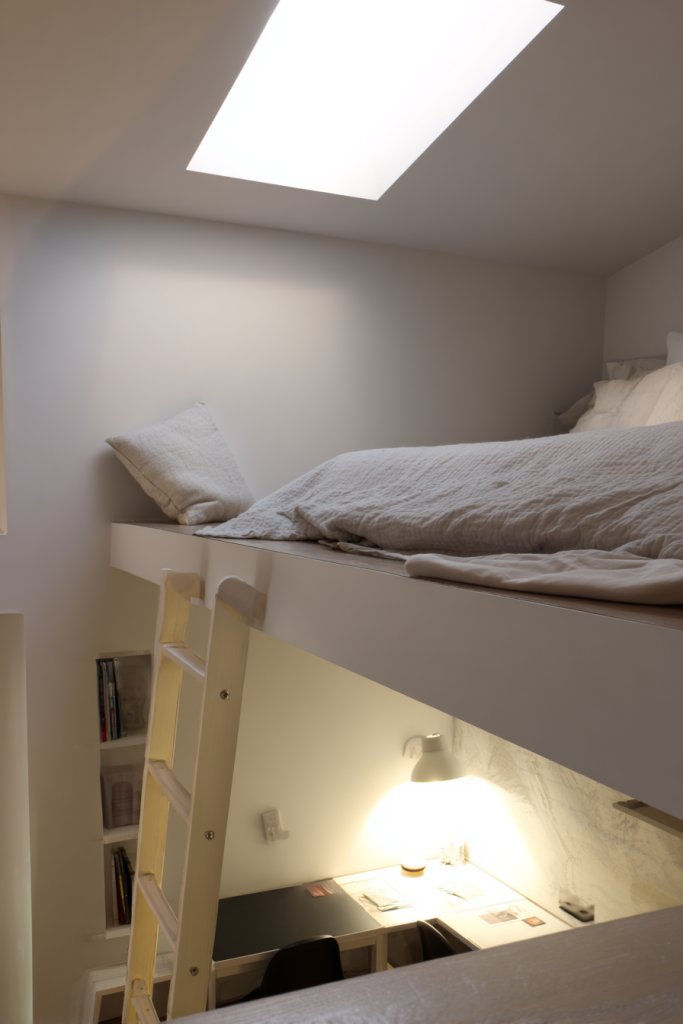
Small homes often lack private retreats, making it hard to create a cozy, personal space. Traditional bedrooms can take up precious floor area that could be used for living or storage. Enter loft bedrooms—a clever way to maximize vertical space and carve out a private sanctuary without sacrificing square footage. Who wouldn’t want a secret hideaway in their own home?
Imagine climbing a compact staircase to a cozy sleeping loft overlooking the main living area. The space is snug but functional, with a soft mattress, layered bedding, and a small side shelf or desk. Underneath, you might find a workspace or additional storage. Natural light filters through a window or skylight, creating an inviting ambiance that feels both private and open.
Loft bedrooms suit various styles—from minimalist with clean lines and neutral tones to boho with textured fabrics and eclectic decor. They work well in studio apartments, tiny houses, or converted attics. To adapt for different seasons, add cozy throws or breathable linens. In colder climates, insulate the loft properly and consider a small heater for comfort.
Start by assessing ceiling height to ensure safe access and headroom. Build a sturdy staircase or ladder with storage options like drawers or shelves integrated into the steps. Use a low-profile bed or futon to maximize space. Incorporate windows or skylights for natural light and ventilation. Finish with durable, lightweight materials for easy maintenance, and add safety railings where needed.
Decorate with layered bedding, textured throws, and cozy pillows to make the loft inviting. Use built-in shelves or hanging organizers for essentials. Add a small desk or reading nook underneath for maximum utility. Personal touches like string lights, artwork, or hanging plants (away from restricted content) can make it uniquely yours.
Loft bedrooms unlock the potential of vertical space, turning small homes into multi-layered retreats. They offer privacy and comfort without sacrificing precious floor area. Once styled right, they become your favorite spot to unwind or work. Ready to elevate your sleeping space? Lofts are the smart, stylish solution for small homes.
6. Sliding Doors and Pocket Doors for Flexible Rooms
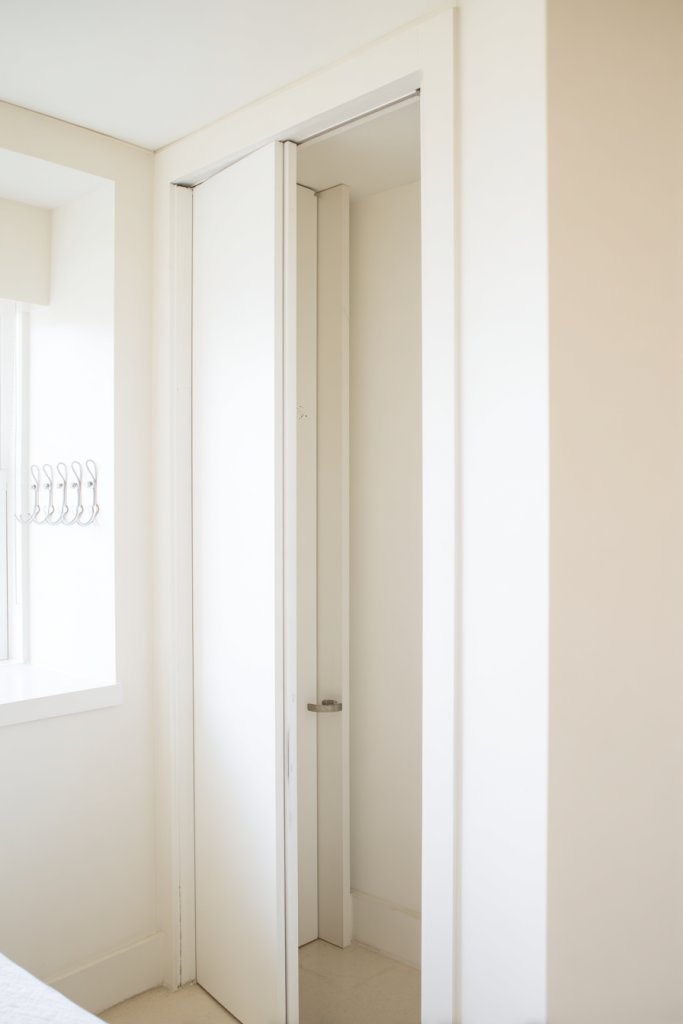
Big, swinging doors are great for grand entrances but terrible for small spaces—they eat up precious room every time they open. Ever wished you could have the same privacy and separation without sacrificing floor space? Sliding and pocket doors are the clever answer, turning what’s usually a barrier into an unobtrusive, space-saving feature. Who knew doors could be so smart?
Picture sleek, flush-mounted sliding doors that glide smoothly along a wall, revealing or concealing rooms as needed. When open, they create a wide, open space; when closed, they offer privacy and sound insulation. The doors can be plain and modern or feature decorative panels matching your decor. Their minimalist design complements any style, making your home feel more spacious and flexible.
Choose from various materials—wood, frosted glass, or mirrored panels—to suit your aesthetic. In small apartments, sliding doors between the bedroom and living space maximize privacy without cluttering the room. For larger homes, pocket doors can separate a home office or laundry room. They also work well in closets, bathrooms, or as room dividers during gatherings.
Start by measuring the doorway and selecting a door type that fits your space and style. Install a sturdy track system that can support the weight of the door—professional help might be needed here. For pocket doors, build a cavity within the wall to hide the door when open. Use soft-close mechanisms to prevent slamming and ensure smooth operation. Finish with hardware that matches your decor, from modern handles to vintage pulls.
Customize sliding doors with decorative hardware, painted finishes, or textured panels. For added privacy, consider frosted or tinted glass. To enhance functionality, add soft-close features or automatic door openers. Use contrasting trim or frames to highlight the doors as architectural features, integrating them seamlessly into your home’s design.
Sliding and pocket doors redefine how you use space and create a more adaptable home environment. They make rooms feel larger and more connected or private, depending on your needs. Once installed, they become the silent heroes of small home design, offering style and function in one package. Ready to ditch swinging doors and embrace flexibility? These doors are the future.
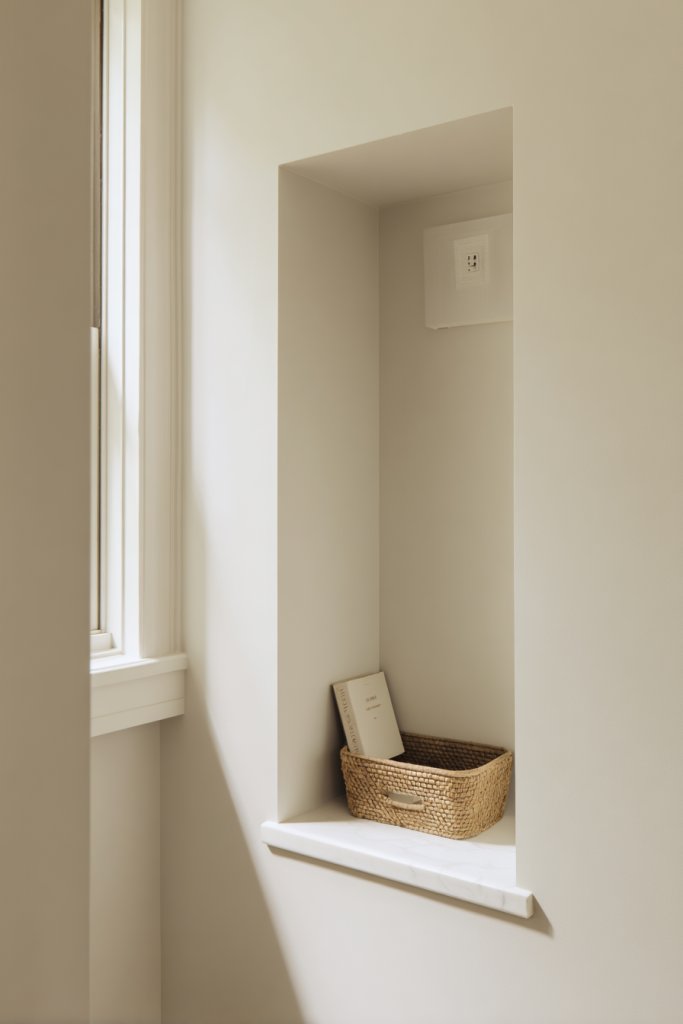
7. Built-In Storage Niches in Walls
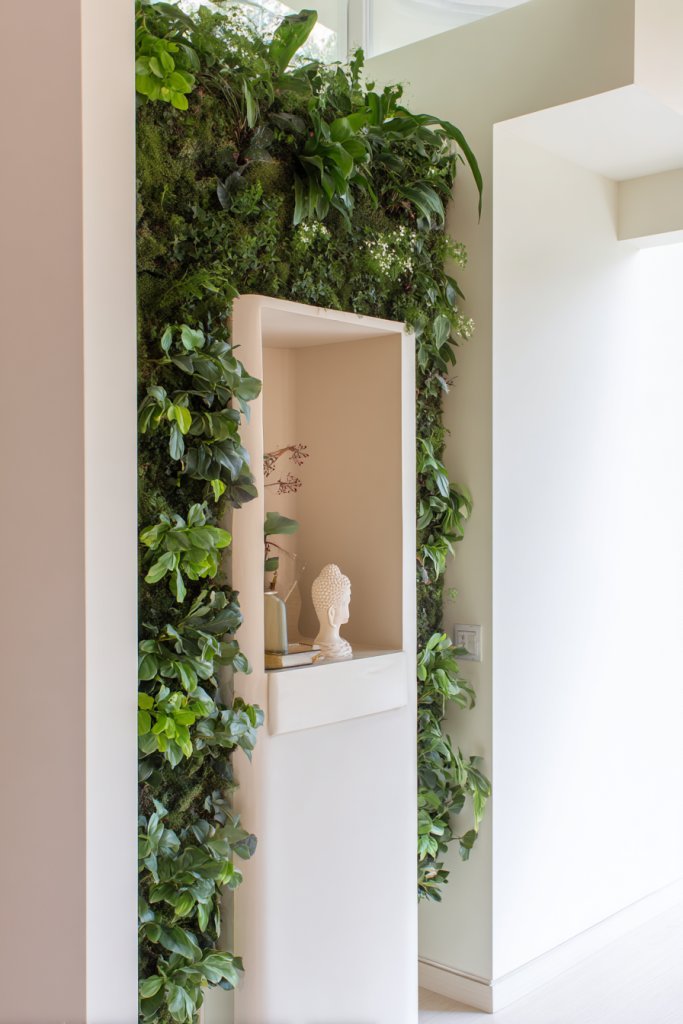
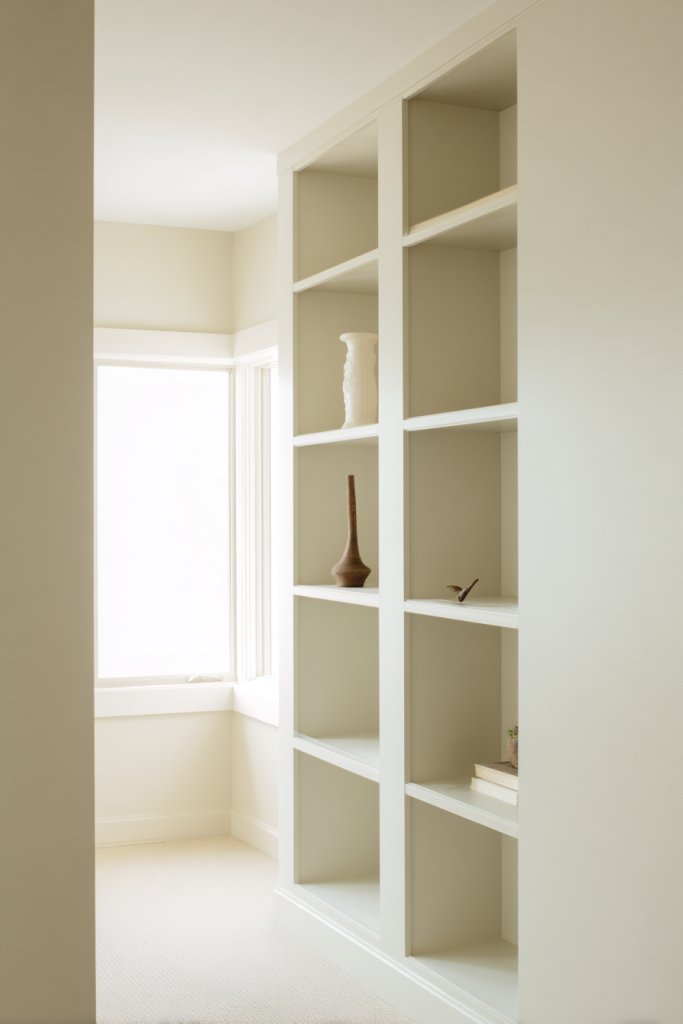
Cluttering up your living space with freestanding units can make even the smallest rooms feel chaotic. The challenge is finding storage that doesn’t take up valuable floor space or disrupt your decor. Built-in niches in walls provide a sleek, integrated solution that looks intentional and saves space. Who wouldn’t want hidden storage that’s part of the architecture?
Visualize recessed shelving cut into a wall, illuminated subtly to display your favorite books, decor, or essentials. These niches blend seamlessly into the wall, creating a clean, minimalist look. They can be placed in living rooms, bedrooms, or even bathrooms, offering a discreet place for everything. The textures of the surrounding wall contrast beautifully with the items displayed, adding depth and interest.
Use niches to showcase decorative objects, framed photos, or functional items like chargers and small appliances. Adjust the depth and size based on your needs—shallow for small items, deeper for larger ones. They work well in modern spaces with flat wall finishes or rustic interiors with textured plaster. For seasonal updates, swap out the items on display or change the lighting accents.
Plan your wall space carefully, considering structural elements and electrical wiring. Hire a professional to cut into drywall or plaster, ensuring clean edges and safe wiring. Finish with a smooth, painted surface around the niche or add textured wallpaper for contrast. Install LED strip lighting or small spotlights for highlighting. Keep the interior of the niches organized with baskets or small containers if needed.
Decorate your niches with themed objects or personalized collections that reflect your style. Use paint or wallpaper inside the niche to add color or pattern. Incorporate lighting to make the display pop. You can also add small hooks or brackets inside for hanging items like jewelry or keys, turning these into multi-use features.
Built-in wall niches elevate your home’s design by combining functionality with sleek aesthetics. They free up surface space and create visual interest—no more cluttered shelves or bulky cabinets. Once integrated, they become the subtle yet impactful elements that tie your decor together. Ready to add hidden storage that’s as stylish as it is smart? The architectural upgrade awaits.
8. Compact Bathroom Designs with Space-Saving Fixtures
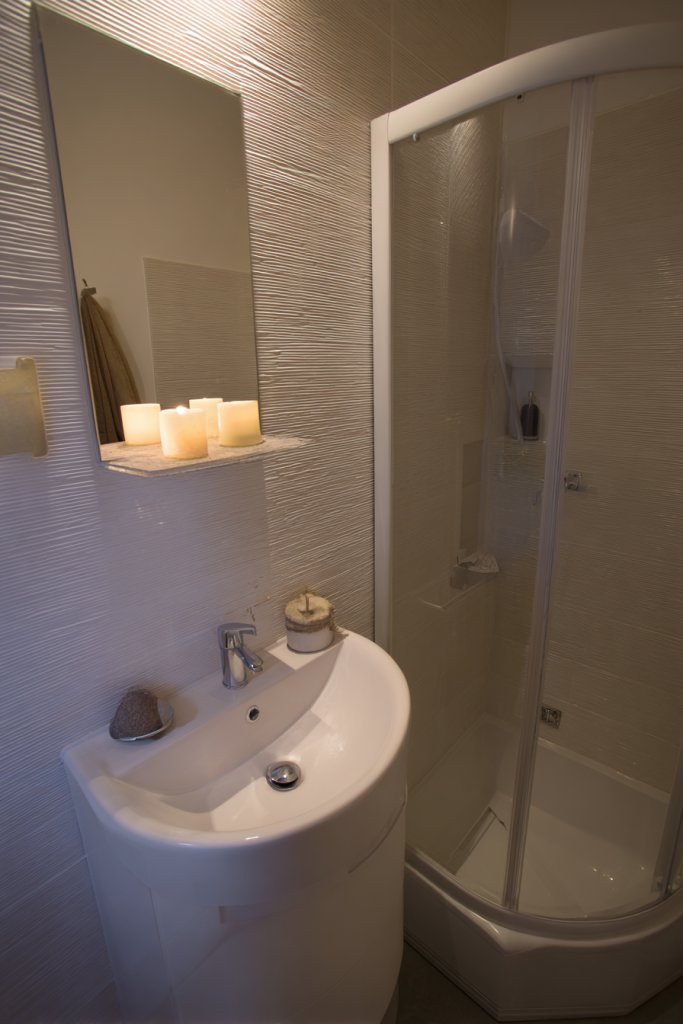
Small bathrooms can feel cramped and frustrating, especially when every inch is precious. Finding fixtures that fit and still deliver comfort seems like an impossible puzzle. The good news? Space-saving fixtures and clever layouts can turn tiny bathrooms into functional retreats. Who says small can’t be stylish?
Envision a corner shower with a glass enclosure that opens up the room, complemented by a wall-mounted toilet and a narrow vanity with storage underneath. Light-colored tiles and minimalistic fixtures reflect light, making the space feel open and inviting. Floating vanities create the illusion of more floor space, while sleek fixtures add a modern touch. The overall effect is a functional oasis, not a cramped closet.
Choose fixtures that suit your style—sleek modern, rustic, or vintage. Compact or corner sinks maximize space, while wall-mounted toilets free up room underneath. In shared bathrooms, consider dual-flush toilets and space-efficient storage solutions like recessed shelves. For seasonal or multi-use bathrooms, versatile fixtures that are easy to clean and maintain work best.
Start by measuring your space carefully, then select fixtures designed for small rooms. Opt for wall-mounted or corner models to free up floor space. Use light-colored, reflective surfaces to enhance brightness. Install fixtures with concealed plumbing to keep the visual clean. Incorporate clever storage—such as recessed niches or vertical cabinets—to keep essentials organized. Proper ventilation and lighting complete the functional design.
Add textured tiles or colorful accents to give your bathroom personality without clutter. Use sleek hardware and minimal accessories to keep the look streamlined. Incorporate hooks or towel bars that double as art or design elements. Consider small, portable storage carts or over-toilet shelves for flexibility. These touches make small bathrooms both attractive and practical.
A compact bathroom with space-efficient fixtures proves that small spaces can be both beautiful and functional. Upgrading your bathroom boosts your daily routine and adds value to your home. With thoughtful design, even the tiniest space can feel like a spa retreat. Ready to make the most of your small bathroom? Space-saving fixtures are the way forward.
9. Optimized Entryways with Hidden Storage
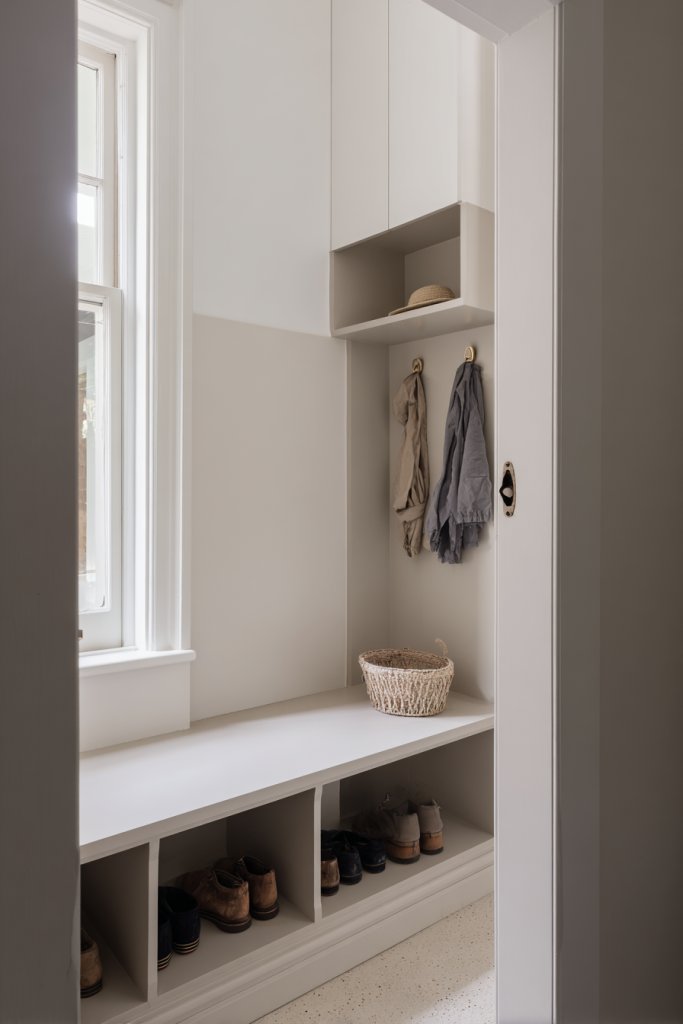
Entryways often become the dumping ground for shoes, coats, and bags, turning into chaotic messes that set the tone for the rest of your home. How can you keep this crucial space tidy without sacrificing style? The answer lies in hidden storage solutions that keep clutter out of sight but within easy reach. Who knew an entryway could be both sleek and practical?
Picture a narrow hallway with a built-in bench that doubles as a shoe cabinet, concealed behind a panel that slides open. Above, wall-mounted hooks or hidden compartments store coats and accessories, maintaining a clutter-free appearance. The space features a neutral palette with textured finishes, making everything look intentional. Small, subtle details like concealed drawers and clever use of vertical space turn chaos into calm.
Choose minimalist cabinetry or hidden drawers for a seamless look, or opt for decorative panels that blend with your wall decor. For seasonal storage, incorporate pull-out bins or under-stair drawers. In smaller apartments, a slim console with hidden compartments maximizes utility. For larger homes, built-in lockers or concealed cabinets provide ample space without cluttering the foyer.
Plan your entryway layout by measuring available space and identifying areas for hidden storage. Use durable materials like laminate or veneered MDF for built-ins that withstand daily wear. Install sliding panels or pocket doors to conceal storage areas, ensuring smooth operation. Incorporate hooks, shelves, or cubbies inside to organize accessories. Finish with a durable top surface or seating cushion for convenience and comfort.
Add decorative hardware or paint finishes to match your home’s style. Incorporate a small mirror with hidden compartments behind it for quick checks and extra storage. Personalize with labels or color-coded bins inside the concealed spaces. Use soft-close mechanisms to ensure quiet, smooth access. These details make your entryway both functional and inviting.
An optimized entryway sets a welcoming tone and keeps your home tidy effortlessly. Concealed storage solutions are the secret to maintaining style without sacrificing practicality. Once you master this space, coming home becomes less stressful and more stylish. Ready to hide the clutter and make a great first impression? Your organized entryway awaits.
10. Light-Reflecting Walls and Large Windows for Brightness
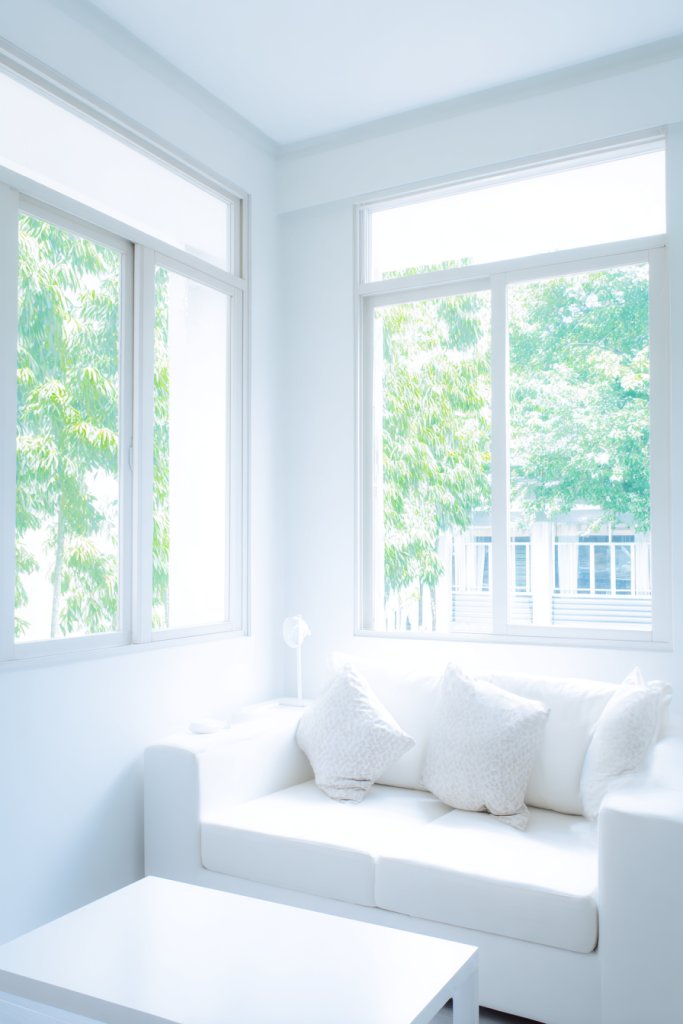
Dark, cramped rooms can make even the most charming home feel oppressive. Limited natural light is a common challenge in small living spaces, making them seem smaller and gloomier. The solution? Brighten things up with reflective walls and large windows that flood your home with natural light. Who doesn’t want a cheerful, airy environment?
Visualize a room painted in a soft, matte neutral tone that bounces light around effortlessly. Large, unobstructed windows let in sunlight, creating a warm glow, while reflective surfaces like glossy tiles or mirrors amplify this effect. Sheer curtains diffuse the light gently, maintaining privacy while keeping the space bright. The overall ambiance feels open, inviting, and full of life.
Use light-colored walls and ceilings to reflect light further, or incorporate mirrors strategically to bounce daylight into darker corners. For colder months, add solar tubes or skylights for extra brightness. In small rooms or narrow spaces, floor-to-ceiling windows or glass doors open up views and extend the visual space. Combining these elements creates a seamless flow of light and openness.
Choose high-quality, light-reflecting paints and finishes to maximize brightness. Install large windows with minimal framing to reduce visual barriers. Use reflective materials like polished stone, glass, or high-gloss cabinetry to bounce light around. Ensure proper insulation and shading options to control glare and temperature. Regularly clean windows and surfaces to maintain their reflective qualities, and consider adding skylights where possible.
Customize your window treatments with sheer fabrics or minimalist blinds that diffuse light softly. Incorporate decorative mirrors with interesting frames to serve as focal points. Play with textured wall finishes or metallic paints to catch and reflect light in different ways. Integrate lighting fixtures that mimic natural daylight for consistent brightness during evenings.
Bright, reflective walls and windows transform small spaces into lively, inviting homes. They boost mood, increase perceived space, and create a sense of freedom. With a few simple design tweaks, your home can feel twice as large and much more welcoming. Ready to let the light in and brighten your life? The transformation starts now.
11. Minimalist Decor for a Clean, Spacious Feel
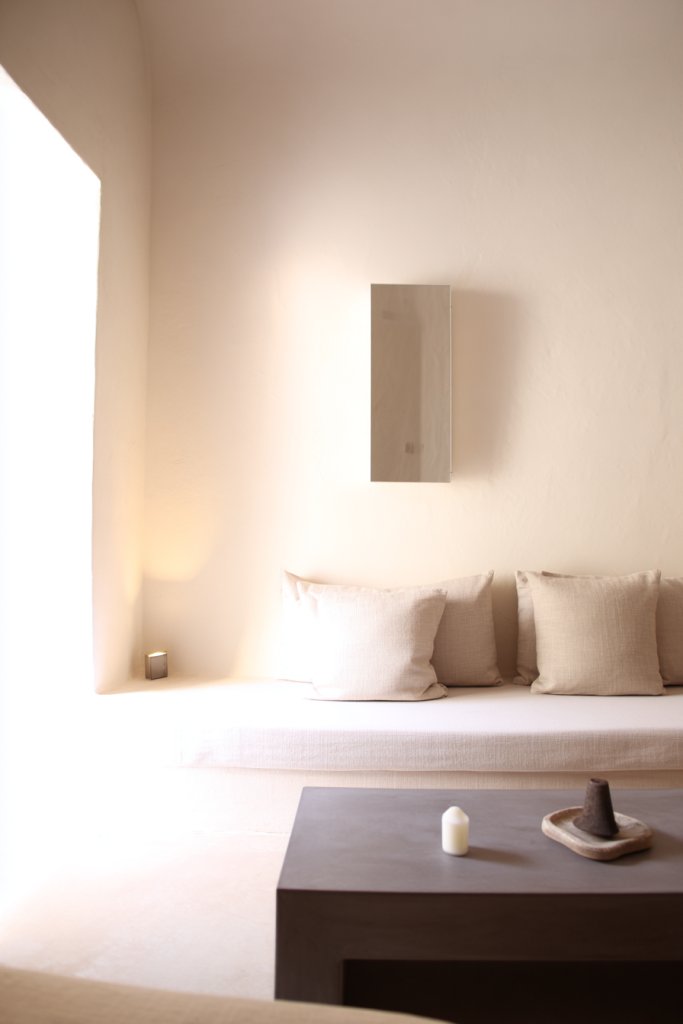
Cluttered homes can quickly turn a cozy space into a stressful maze. When every surface is filled with stuff, it’s hard to relax or focus. Minimalist decor offers a way to declutter your home visually and psychologically, making rooms feel larger and more peaceful. Who knew less could be so much more?
Imagine a room with simple, streamlined furniture, neutral tones, and only a few carefully chosen decor pieces. Open space dominates, with clean lines and hidden storage keeping surfaces tidy. Textures are subtly layered through natural fabrics and smooth surfaces, creating a calm, balanced environment. The overall vibe is uncluttered serenity that invites you to breathe deeply.
Minimalism doesn’t mean boring—use bold, sculptural furniture or statement textiles to add personality. Seasonal changes can be made with simple swaps of cushions, throws, or rugs. Styles range from Scandinavian with light woods and whites to modern industrial with metal accents and concrete finishes. The key is maintaining a sense of order and purpose in every item.
Start by decluttering, then choose furniture with simple forms and neutral colors. Incorporate hidden storage solutions to keep surfaces clear. Use a monochromatic palette or subtle contrast for visual coherence. Limit decorative items to a few statement pieces like a sleek clock or a sculptural vase. Maintain cleanliness and organization to sustain the minimalist aesthetic.
Add texture through textiles like a soft cream throw blanket with chunky knit texture or woven baskets for storage. Incorporate personal touches with meaningful objects kept intentionally minimal. Use lighting fixtures with simple shapes and finishes that complement the overall style. Keep surfaces free of unnecessary clutter to preserve the clean look.
Minimalism creates a sanctuary from chaos, making every day feel calmer and more manageable. It emphasizes quality over quantity, so investing in good furniture pays off long-term. Once mastered, this style can evolve with you, always focusing on what truly matters. Ready to embrace less and live more peacefully? Minimalist decor is your new best friend.
12. Under-Stair Storage Solutions
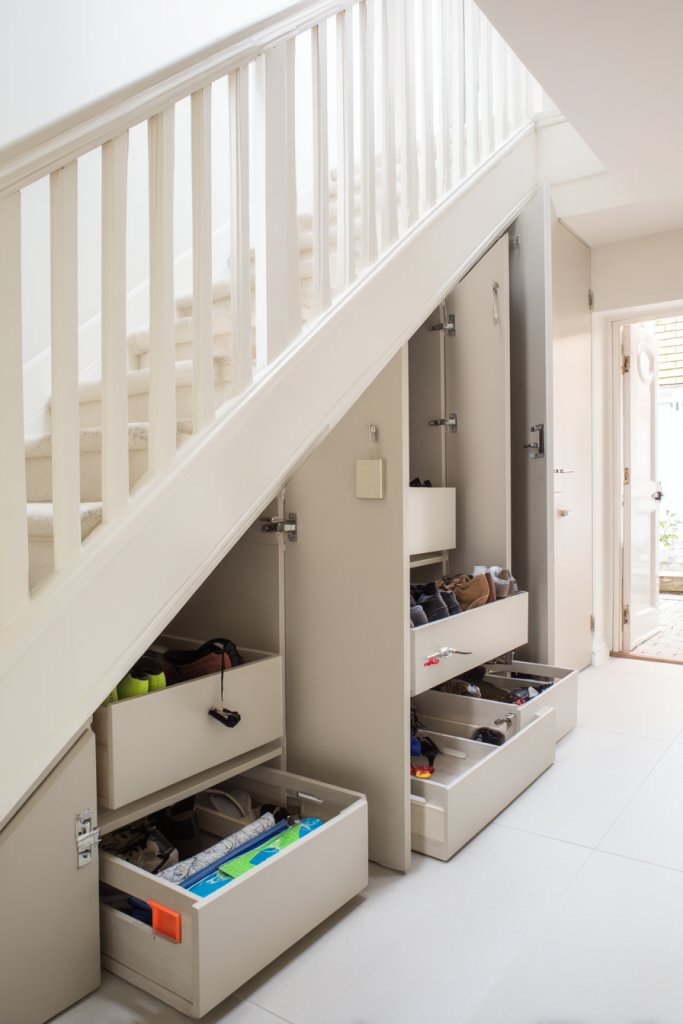
Wasted space under stairs is a common design oversight that turns into a dump zone—think shoes, cleaning supplies, or random clutter. Small homes can’t afford to lose any square inch, so why not turn this neglected area into a smart storage solution? It’s like giving your home a secret weapon against clutter.
Picture a staircase with custom-built drawers or cabinets seamlessly integrated into the risers. Inside, you can store shoes, books, or seasonal clothing, keeping everything hidden yet accessible. The surrounding wall can be painted or finished with textured panels, making the storage blend into the decor. This transforms a dull corner into a tidy, functional feature.
Use sliding or hinged doors that match your wall color for a sleek look. In smaller homes, install pull-out drawers for maximum efficiency. In larger spaces, add a small seating area or display shelf on top. For a rustic feel, use wooden crates or baskets inside the compartments. Seasonal or infrequently used items can be stored deeper inside for out-of-sight organization.
Measure the space carefully to plan the size and number of compartments. Work with a carpenter or DIY with pre-made units that fit your dimensions. Ensure the structural support can handle the weight, especially if storing heavy items. Finish with paint or laminate that matches your home’s aesthetic. Regularly declutter to keep the under-stair storage functional and neat.
Decorate the front panels with paint, wallpaper, or decorative hardware to make it a focal point. Incorporate hooks or small racks inside for hanging keys or accessories. Use labeled bins or baskets for organizing smaller items. Enhance accessibility with soft-close mechanisms or gas lifts for heavy doors. It’s a hidden gem that keeps your home organized and stylish.
Under-stair storage takes a neglected space and turns it into a practical, attractive feature. It’s a smart move that increases your home’s functionality while maintaining a clean look. Once you harness this space, you’ll wonder how you ever lived without it. Ready to maximize every inch? The secret’s in the details.
13. Compact Home Office Nooks
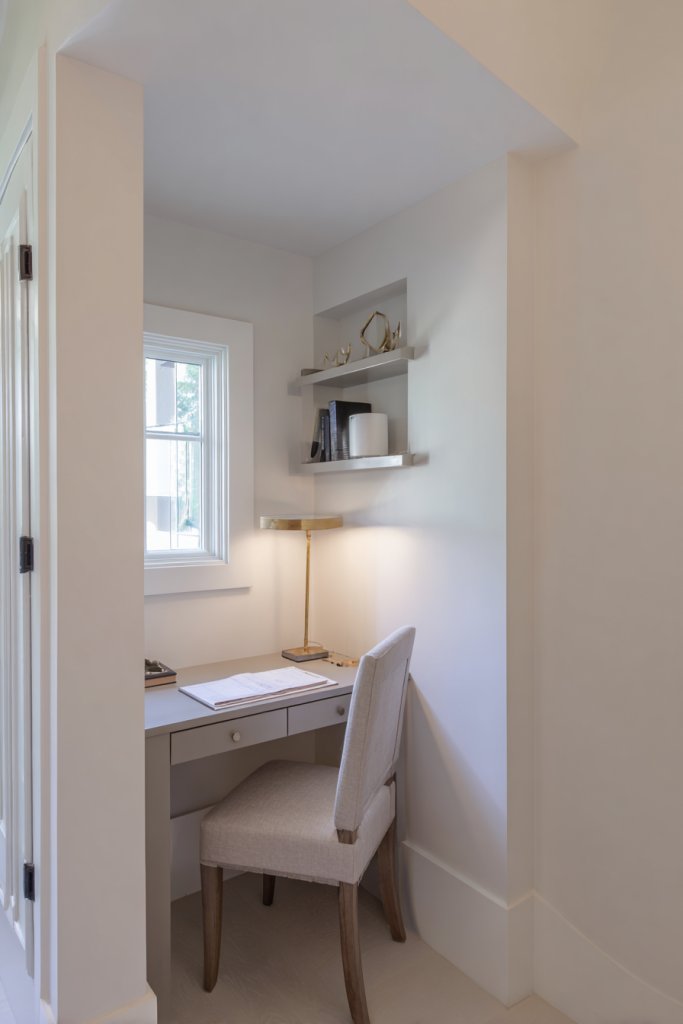
Working from home or studying in a small space often feels like trying to fit a square peg in a round hole. Cluttered desks and noisy environments kill productivity and increase stress. A dedicated, cozy home office nook can make a huge difference in focus and motivation. Who says you need a whole room to work effectively?
Imagine a tucked-away corner with a built-in desk that fits snugly into the wall. Shelves above hold essentials, while a comfortable chair invites you to settle in. Soft lighting and a textured wall backdrop create a calming atmosphere, free from distractions. This dedicated space transforms a blank wall into your productivity hub, blending seamlessly with your home’s style.
In small apartments, use a fold-down desk or a narrow console that doubles as a workspace. For larger homes, create a dedicated alcove with custom cabinetry and dedicated lighting. Incorporate cork or whiteboard panels for notes and planning without cluttering the desk surface. Seasonal or multi-purpose rooms can convert from guest space to office with a few clever tweaks.
Identify an available corner or alcove and measure the space. Install a wall-mounted fold-down or sliding desk, ensuring stability and easy access. Add shelving or pegboards for storage without taking up footprint. Use task lighting like adjustable sconces or LED strips for optimal illumination. Keep cables organized with clips or sleeves for a tidy look.
Personalize your nook with colorful accessories, a corkboard, or decorative wall paint. Use a comfortable chair that supports good posture for long hours. Incorporate a small plant or decorative item (avoiding restricted content) to make it inviting. Keep it clutter-free with organizers and minimal decor, so it remains a focused workspace.
A dedicated home office nook can boost your productivity and help set boundaries between work and leisure. It proves that even in a small home, you can carve out a functional, stylish workspace. Once established, it becomes your go-to spot for focus and creativity. Ready to work smarter, not harder? Your perfect nook is waiting.
14. Fold-Down Tables for Dining and Work
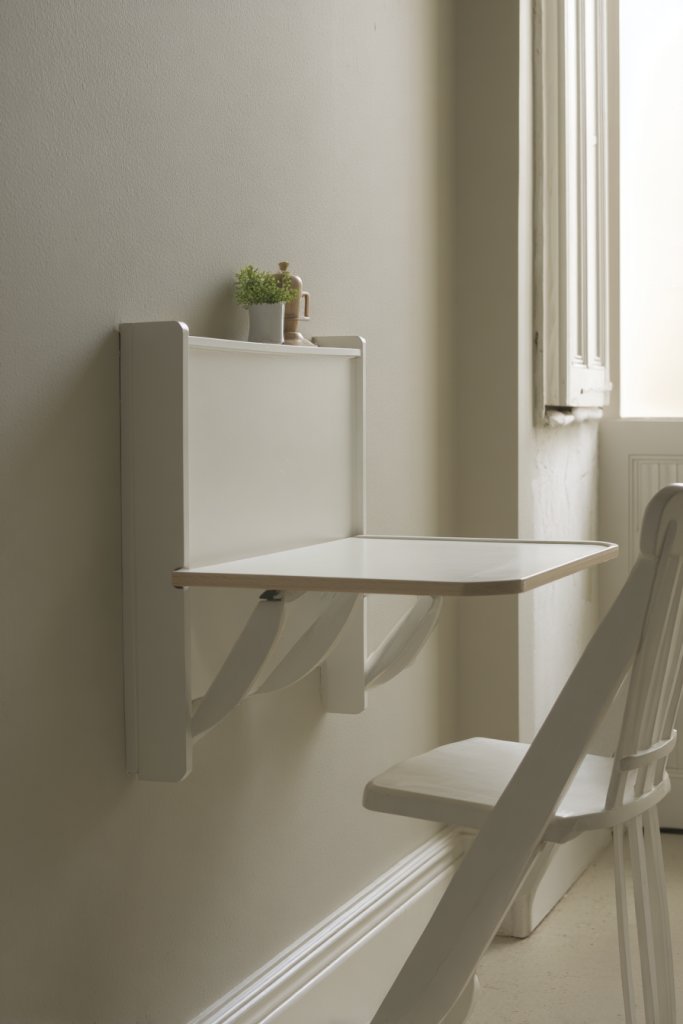
Dining or working in tiny spaces often feels like a constant battle to keep surfaces clear. Large tables take up too much room when not in use, making your home feel cluttered and cramped. Fold-down tables are the secret weapon for maximizing versatility without sacrificing style or space. Who wouldn’t want a table that disappears when not needed?
Imagine a sleek wall-mounted table that folds down easily, revealing a clean wall when stowed away. When you need it, it folds out to seat four comfortably, with chairs tucked neatly beneath. The surface is smooth and durable, with a minimalist finish that blends into your decor. During meals or work sessions, it becomes the heart of your home, then folds away to reclaim space.
Choose from different mechanisms—pivot, slide, or drop-leaf—to suit your style. Use slim, stackable chairs for added space efficiency, or incorporate built-in seating. For multi-purpose rooms, pair the table with a fold-up wall bed or a hidden storage unit. These tables can be customized in materials and finishes to match your aesthetic, from rustic wood to sleek laminate.
Start by selecting a wall with enough clearance for folding mechanisms. Install a sturdy mount capable of supporting the table’s weight. Choose a mechanism—like a hinge or a pivot—that’s easy to operate daily. Finish with a durable surface treatment, and add foldable or stackable chairs for convenience. Test the system thoroughly before regular use to ensure smooth operation and safety.
Personalize with colorful hardware, textured finishes, or decorative edge details. Use cushions or covers on chairs to match your decor theme. Incorporate small storage compartments on the wall or underneath for utensils, stationery, or other essentials. During special occasions, bring out extra chairs or add a decorative centerpiece to make the space inviting.
A fold-down table turns a tiny home into a multifunctional space for dining, working, or crafting. It’s a smart, space-saving solution that adapts to your needs daily. With this setup, you can entertain guests or work from home without feeling cramped. Ready to make your home more versatile? A fold-down table is your new best friend.
15. Multi-Level Floor Plans for Zone Separation
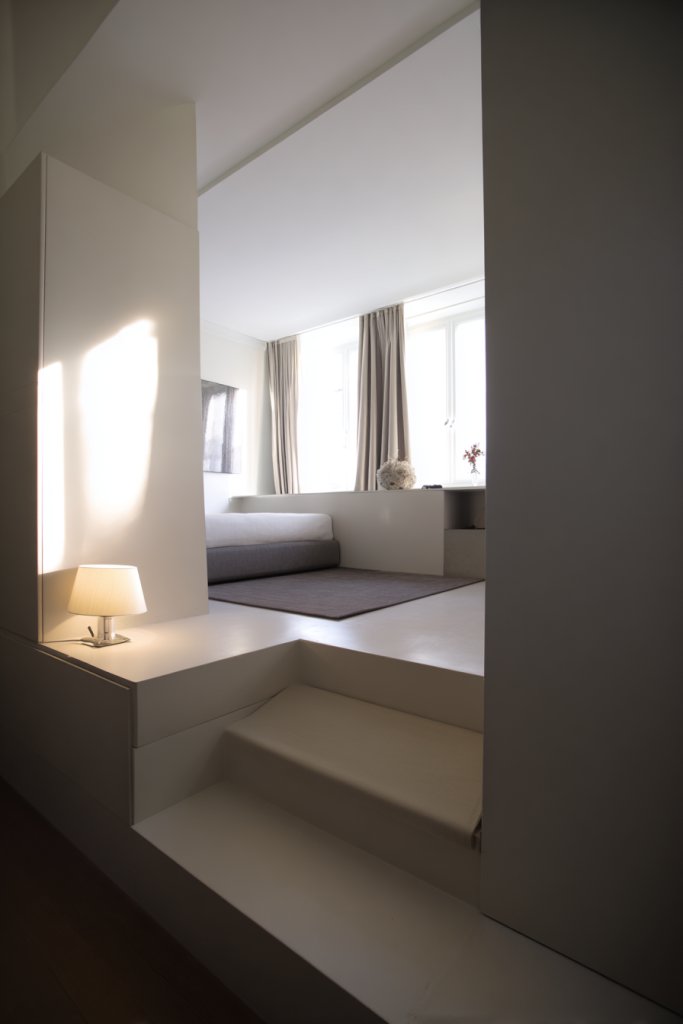
Open floor plans are great for making small spaces feel airy, but sometimes you need a bit of separation—especially when working, sleeping, or entertaining. Building multi-level zones within a single footprint creates distinct areas for different activities without adding walls. It’s like creating rooms within a room, but with style.
Picture a living area on one level with a cozy sitting nook, while a slightly raised platform holds a sleeping area or workspace. The change in floor height defines each zone visually and functionally. Using different textures or finishes, like wood and tile, adds contrast and interest. These subtle shifts make the space feel larger and more organized, like a mini multi-room layout.
Multi-level plans work well in lofts, tiny homes, or open-plan apartments. They can be as simple as a step or as elaborate as a split-level with partial walls. Use rugs, lighting, or color to further differentiate zones. In seasonal homes, consider removable platforms or foldable sections that can adapt to your needs.
Design your zones carefully, considering ceiling heights and load-bearing walls. Build platforms with sturdy framing and finish with flooring that contrasts or complements the main level. Use open risers or transparent materials to keep sightlines open. Incorporate lighting to define each level and ensure smooth transitions for safety. Consult a professional for structural assessments if needed.
Add personal touches like decorative trims, built-in shelves, or custom lighting to each level. Use textiles—rugs, cushions, or curtains—to soften transitions and add warmth. Incorporate storage under or around the platforms for maximum utility. Keep the design cohesive while allowing each level to have its own personality.
Multi-level floor plans unlock the potential of vertical space, making small homes feel more expansive and organized. They provide visual interest and functional separation without sacrificing openness. Once you master this layout, your home becomes a dynamic, versatile environment. Ready to elevate your space? Multi-level zones are the way to go.
16. Use of Light Colors and Neutral Palettes
Dark walls and heavy furniture can make small rooms feel boxed in and oppressive. Most people want their homes to feel bright, airy, and welcoming—especially when space is limited. Light colors and neutral palettes are the secret to visually expanding your space and enhancing mood. Who doesn’t want their home to feel fresh and open?
Imagine walls painted in soft whites, creams, or gentle greys that reflect natural light beautifully. Complement these with furniture in similar tones or subtle contrasts, avoiding heavy or dark pieces. Large windows or glass doors allow sunlight to flood the space, bouncing off the walls and creating a sense of spaciousness. Natural textures like linen, cotton, or jute add warmth without weight.
Neutral palettes can be layered with textures—think a plush rug, woven baskets, or textured cushions—to add depth. Seasonal accents like colorful throws or artwork bring variety without overwhelming. For a cozy winter look, incorporate warm beige or taupe, and switch to cooler shades like pale blue in summer. These tones also serve as a perfect backdrop for personal decor and artwork.
Start with light, neutral wall paints and add reflective surfaces like mirrors or glossed furniture to enhance light. Use window treatments that maximize natural brightness—sheer curtains or minimal blinds. Keep accessories minimal but impactful—think subtle metallic accents or textured fabrics. Regular cleaning of windows and surfaces maintains maximum brightness and clarity. Layer lighting with warm LED bulbs to mimic daylight in evenings.
Incorporate personal style with textured textiles or colorful accents that pop against the neutral backdrop. Use decorative hardware or furniture with unique shapes to add interest. Keep clutter out of sight with hidden storage or minimalist shelving. Small decorative elements like woven baskets or soft textiles can change the vibe seasonally or as your taste evolves.
Using light colors and neutral palettes makes any space look larger and more inviting, boosting your mood and comfort. It’s an easy, timeless way to refresh your home without a full overhaul. These shades serve as a perfect canvas for your personal style and updates. Ready to brighten your space and lift your spirits? Light and neutral is the way to go.
17. Incorporating Outdoor Space for Living Extension
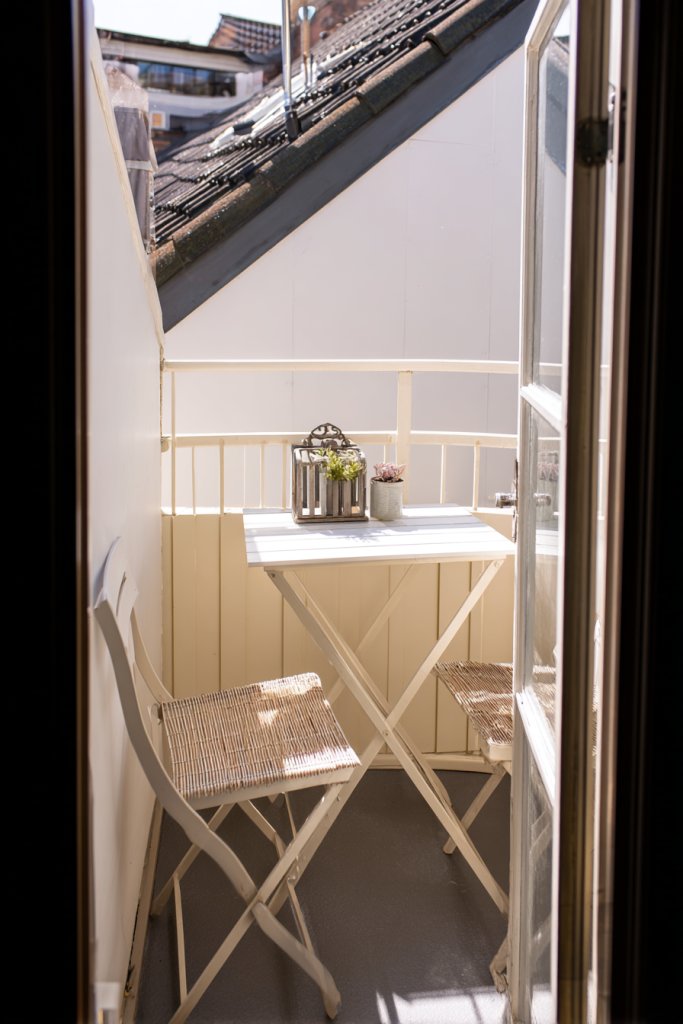
Indoor space is often limited, but outdoor areas are frequently underutilized. Extending your living space outdoors can dramatically increase functional square footage. Whether it’s a tiny balcony or a small patio, outdoor spaces offer fresh air and a change of scenery—especially valuable in small homes. Who says livability stops at four walls?
Picture a compact balcony with a foldable bistro set and a few potted plants, or a small patio with a cozy seating area surrounded by string lights and greenery. These outdoor extensions feel like an extra room—only fresher and more relaxed. They’re perfect for morning coffee, evening chats, or simply enjoying nature without leaving home. The visual effect is inviting and effortless.
Use weather-resistant furniture and textiles to create a cozy outdoor lounge. Incorporate vertical gardens, hanging planters, or compact herb gardens to add greenery without taking up floor space. In colder climates, add retractable awnings or outdoor heaters for year-round comfort. Even a small balcony can feel like an oasis with the right arrangement and decor.
Start by assessing your outdoor area’s size and exposure. Choose durable furniture that fits your style—think sleek metal, woven rattan, or wooden sets. Add lighting with solar-powered or battery-operated options to extend usability into the evening. Use compact planters or vertical gardens to maximize greenery without cluttering space. Keep pathways clear for easy movement and safety.
Add personal touches like colorful cushions, outdoor rugs, or decorative lanterns. Incorporate privacy screens or retractable shades for sun and wind protection. Use storage benches or small cabinets to stash outdoor essentials neatly. Seasonally, update cushions or add cozy throws to make the space inviting year-round.
Outdoor living extends your home’s footprint, making small spaces feel larger and more versatile. It’s a simple upgrade that offers a big return in comfort and style. Once you connect your indoor and outdoor areas, your home becomes a true sanctuary. Ready to create your outdoor oasis? The extension is waiting for your personal touch.
18. Clever Closet and Wardrobe Organization
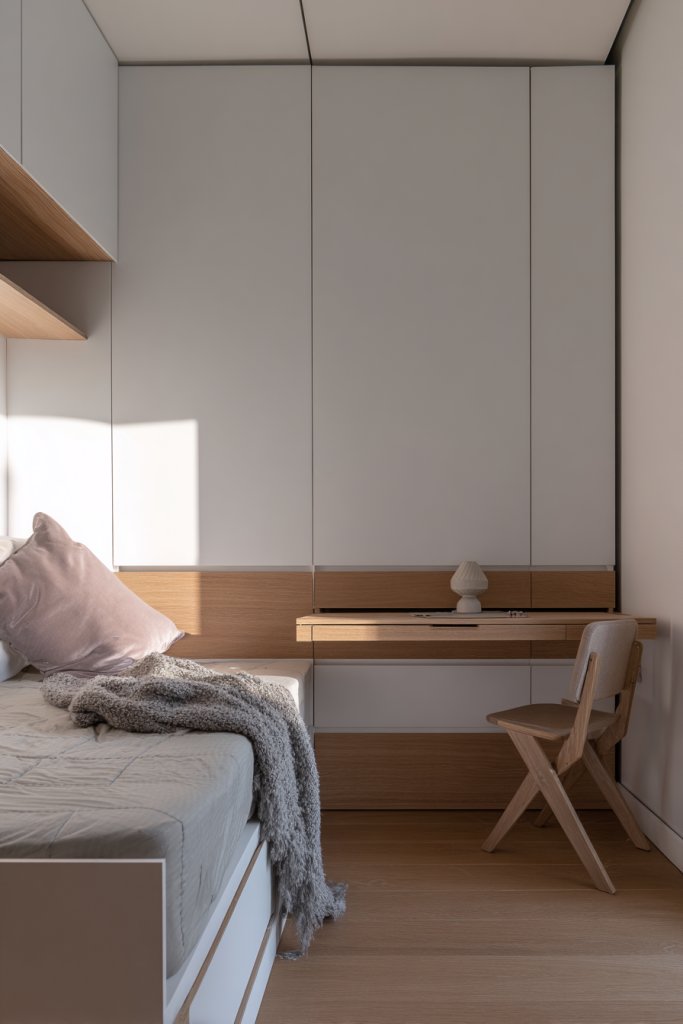
Cluttered closets turn mornings into chaos, and small bedrooms into storage nightmares. Finding space for all your clothes and accessories without taking up precious room is a challenge. Clever organization solutions turn chaos into order, making your wardrobe work for you. Who knew that small closets could hold so much?
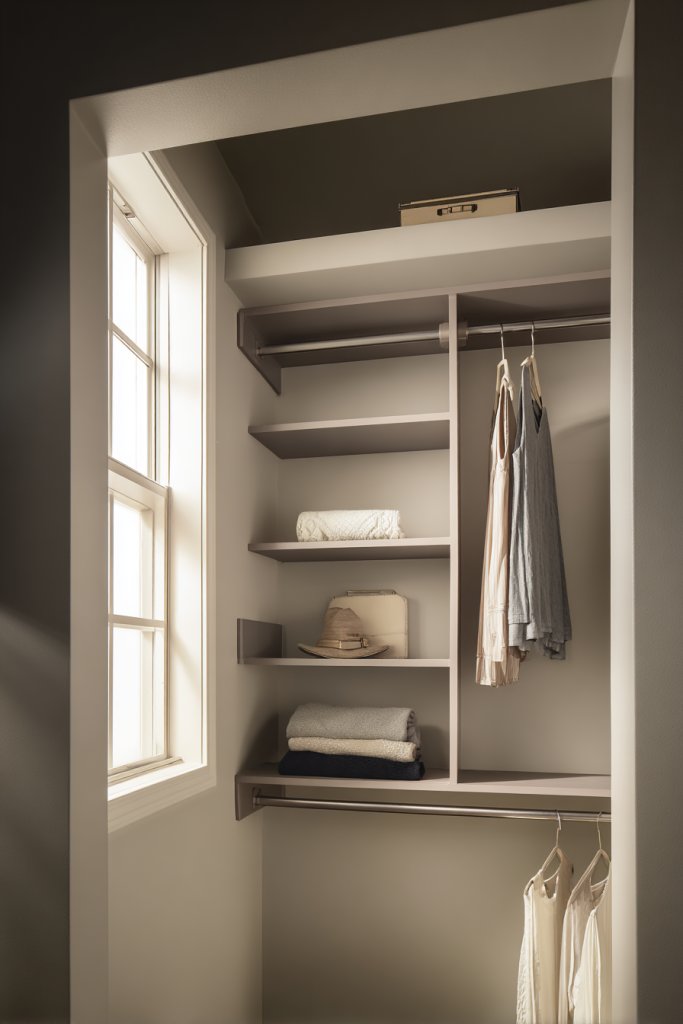
Visualize a sleek, built-in wardrobe with multiple compartments—hanging rails, drawers, and cubbies—all designed for specific items. Inside, neatly folded stacks, hanging accessories, and labeled bins keep everything accessible. Sliding doors or mirrored fronts hide the clutter, maintaining a clean, streamlined look. The result: a clutter-free sanctuary that makes mornings smooth.
Use vertical organizers, pull-out baskets, or stacking cubes to maximize space. In small bedrooms, consider fold-away or ceiling-mounted racks that tuck out of sight when not in use. For seasonal wardrobe changes, incorporate clear bins or labeled boxes for off-season items. Modular systems offer flexibility to reconfigure as your needs evolve.
Start by measuring your closet space and identifying your storage needs. Install adjustable hanging rods, shelf dividers, and pull-out drawers for maximum versatility. Use vertical space with hanging organizers or cascading hooks. Finish with good lighting inside the closet, and keep everything labeled for easy access. Regular decluttering keeps your closet functional and tidy.
Add decorative hardware or paint the interior to match your decor. Incorporate jewelry organizers, scarf hangers, or shoe racks for specialized storage. Use fabric bins or baskets to hide miscellaneous items while adding texture. Personal touches like framed photos or stylish knobs can turn a functional closet into a design feature.
A well-organized closet frees up space and simplifies your daily routine, making life easier and more enjoyable. It shows that smart storage turns even small rooms into functional, stylish retreats. Once you master closet organization, you’ll wonder why you didn’t do it sooner. Ready to transform your wardrobe into a clutter-free zone? The secret is clever storage solutions.
19. Compact Staircases with Storage Capabilities

Stairs in small homes often feel like wasted space, especially when they’re bulky and lack functionality. Yet, they’re a natural place to add storage and free up other areas. Space-efficient staircases with built-in drawers or shelves turn this often-overlooked feature into a practical asset. Who knew stairs could be so clever?
Imagine a sleek staircase with each riser containing a hidden drawer or compartment for shoes, linens, or tools. The staircase itself is minimalist, with clean lines and a lightweight frame that doesn’t overpower the room. Underneath, open space or additional storage options create a seamless, organized look. It’s a perfect blend of form and function.
Choose from various designs—straight, L-shaped, or spiral—to suit your space. Incorporate drawers, open shelves, or hidden compartments for different storage needs. Use lightweight materials such as plywood or metal for easier installation and maintenance. In small bedrooms or attics, these stairs save space while providing extra storage.
Start by measuring your staircase area and selecting a design that fits. Work with a carpenter or DIY with pre-fabricated kits, ensuring sturdy construction. Install drawers or shelves that slide smoothly, and reinforce the structure for safety. Use finishes that match your decor—paint, veneer, or metal accents. Regular maintenance ensures safety and functionality.
Decorate the front with contrasting paint or hardware to add visual interest. Incorporate small labels or organizers inside drawers for easy access. Use lighting—LED strips or spotlights—to highlight the staircase and storage areas. Personalize with decorative decals, textured finishes, or hardware that complements your overall style.
A space-efficient staircase with storage turns a necessary feature into a design highlight. It makes small homes more functional and keeps clutter tucked away. Once you see how much extra space you gain, you’ll wonder why you didn’t do it earlier. Ready to step up your storage game? The clever staircase is your new secret weapon.
20. Zone Lighting for Function and Ambiance
Small spaces can feel dim and uninviting without proper lighting. Overhead fixtures alone often leave corners dark and areas lacking focus. Zone lighting allows you to highlight specific areas for work, relaxation, or ambiance, making your home more functional and cozy. Who doesn’t want a space that’s lit just right?
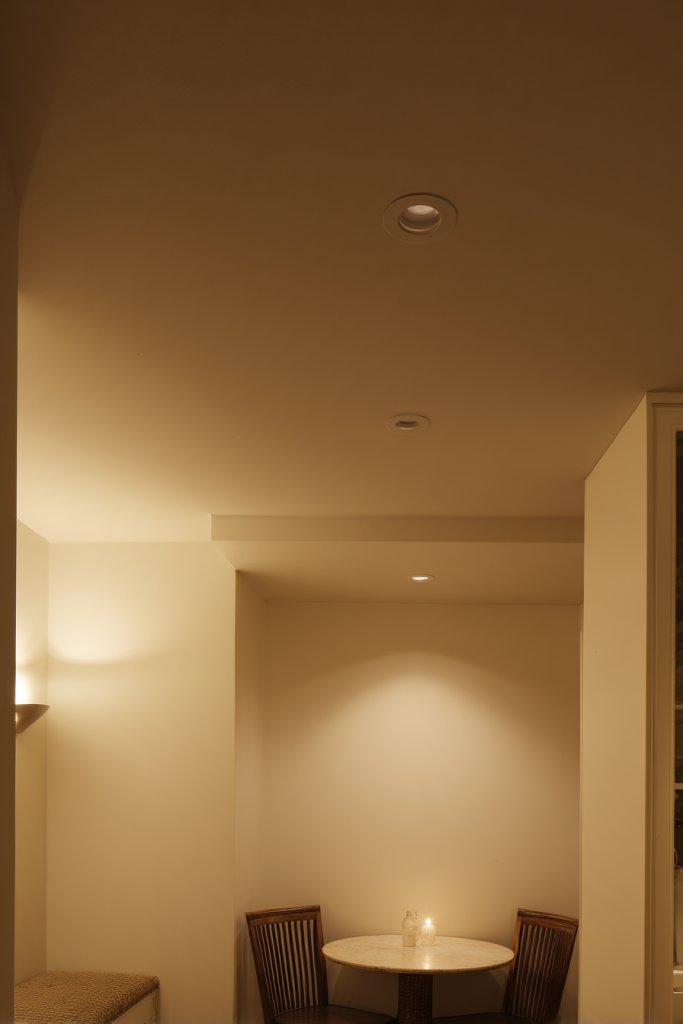
Imagine layered lighting—bright task lights over a kitchen counter, soft ambient lights in the living area, and accent lights highlighting architectural features. Dimmable options let you adjust the mood at will, from lively to tranquil. Carefully placed spotlights and sconces create pools of light that define different zones, giving your home a professional, curated feel. It’s like having multiple lighting scenes in one space.
Use adjustable track lighting or wall-mounted sconces to direct light where needed. Incorporate LED strips under cabinets or shelves for subtle illumination. In bedrooms, use bedside reading lights and soft overhead lighting for relaxation. For multi-purpose rooms, layer lighting to switch effortlessly between work mode and cozy evening ambiance. The goal is versatility and control.
Plan your lighting zones based on activity areas—kitchen, living, workspace, or bedroom. Install dimmers for flexibility. Choose fixtures that match your decor—sleek modern sconces, industrial pendants, or vintage bulbs. Use LED bulbs for energy efficiency and longevity. Position lights to avoid glare and shadows, and consider smart controls or timers for convenience.
Add decorative fixtures that serve as focal points or art-like elements. Incorporate colored or adjustable lights to match your mood or decor. Use lighting to highlight textures, architectural details, or artwork (if applicable). Personalize with smart technology for voice or app control, making your home both stylish and smart.
Zone lighting elevates small spaces by combining practicality with ambiance, making your home inviting and adaptable. It’s a simple upgrade that transforms everyday living into a curated experience. Once mastered, lighting can dramatically change the feel of your home, boosting comfort and style. Ready to light up your life? The power is in your hands.
21. Minimalist Window Treatments

Minimalist window treatments are all about keeping things simple yet effective—think clean lines and understated designs that blend seamlessly into your small space. The goal is to let natural light flood in without cluttering the room with bulky curtains or heavy drapes. Ever wondered why some rooms just feel more open and airy? It’s usually because they use sleek blinds, shades, or minimalistic roller screens that don’t compete with the rest of the decor. These options give you control over privacy and light, while maintaining a streamlined look that complements any modern or Scandinavian-inspired style.
When it comes to choosing materials, think lightweight fabrics like linen or sheer polyester for a breezy feel. These fabrics soften the sunlight, creating a warm glow without blocking the view. If privacy is a concern, layered solutions work well—pair sheer shades with a thin roller blind that you can pull down at night. For a more polished aesthetic, sleek aluminum or wood blinds can add texture and contrast without overwhelming the window frame. The key is to pick something that’s functional but also adds a subtle sophistication.
The beauty of minimalist window treatments lies in their versatility. You can adapt them to any space, from tiny bedrooms to compact kitchens. For a cozy reading nook, try pleated shades that are easy to raise or lower, providing privacy when needed. In a small living room, roller shades in neutral tones can make the window area feel like a deliberate design feature rather than an afterthought. Plus, these treatments usually come with simple installation, so even if you’re not handy, you can DIY it without much fuss.
Installation is pretty straightforward, but a little prep can make all the difference. Measure your windows carefully, accounting for any trim or molding. Most roller or shade blinds come with mounting brackets—just attach them to the wall or ceiling, depending on your preference. For a seamless look, opt for inside-mount brackets that fit neatly within the window frame. No complicated hardware or tools are necessary, and you’ll avoid that bulky, cluttered appearance that traditional curtains often bring. FYI, regular cleaning is super easy—just wipe with a damp cloth to keep things looking fresh.
To add a personal touch, consider choosing treatments in subtle textures or matte finishes that reflect your style without adding visual weight. If you want a tiny pop of color, pick shades in muted pastels or earthy tones, which work well with minimalist palettes. You can also experiment with different shapes—horizontal or vertical blinds—to create interesting visual lines that enhance the room’s architecture. These small details make a big difference in how open and inviting your space feels, all while keeping your window area tidy and clutter-free.
So, if you’re craving a sleek, fuss-free way to dress your windows, minimalist treatments are the way to go. They blend function and style effortlessly, making your small house look bigger and brighter. Plus, they’re incredibly low-maintenance, so you don’t have to fuss over them every week. With a little planning and the right choices, your windows can become a subtle yet impactful feature—adding light, privacy, and a touch of modern elegance without the clutter. Why settle for anything else when simple is often the best?
22. Efficient Use of Nooks and Recessed Areas
Small homes often have awkward corners or tiny alcoves that go unused or become clutter magnets. Smartly utilizing these recesses turns wasted space into functional zones, maximizing every inch of your home. It’s surprising how much potential hidden in the corners can be unlocked with a little creativity. Who knew that small nooks could be big on utility?
Imagine a cozy reading corner tucked into a recessed alcove with a built-in seat and shelves for books or decor. Another space could serve as a mini pantry or a compact laundry station, neatly tucked away from main living areas. These niches can be finished with textured wall treatments or painted to match the room, creating seamless, purposeful features that blend into your space. The effect is a home that feels thoughtfully designed and incredibly efficient.
Use niches for different purposes—small workstations, craft corners, or display shelves—depending on your lifestyle. Finish with built-in cabinetry, floating shelves, or even cushioned seats for comfort. In kitchens, recesses can hold appliances or spices, freeing up counter space. In bedrooms, small wall pockets can organize accessories or chargers. The key is customizing each nook for maximum function.
Identify unused corners or alcoves and plan their purpose. Work with a carpenter or DIY with pre-made units, ensuring proper measurements and support. Finish with durable paint or wallpaper, and install lighting—such as concealed LEDs or spotlights—to highlight the space. Keep the interior organized with baskets, hooks, or small containers. Regular upkeep keeps these hidden areas useful and inviting.
Add decorative elements like colorful backsplashes, textured finishes, or personalized signage. Incorporate functional accessories—like hooks or small drawers—to keep items organized. Use cushions or rugs to make seating areas inviting. Matching the finish and hardware to your decor creates a cohesive, integrated look that feels intentional.
Maximizing every nook turns your home into a well-thought-out space that’s both beautiful and functional. These hidden areas keep clutter out of sight while adding character and utility. Once you master this technique, your home feels more spacious and personalized. Ready to discover the potential hiding in those small corners? The secret is clever design.
23. Incorporating Movable Partitions
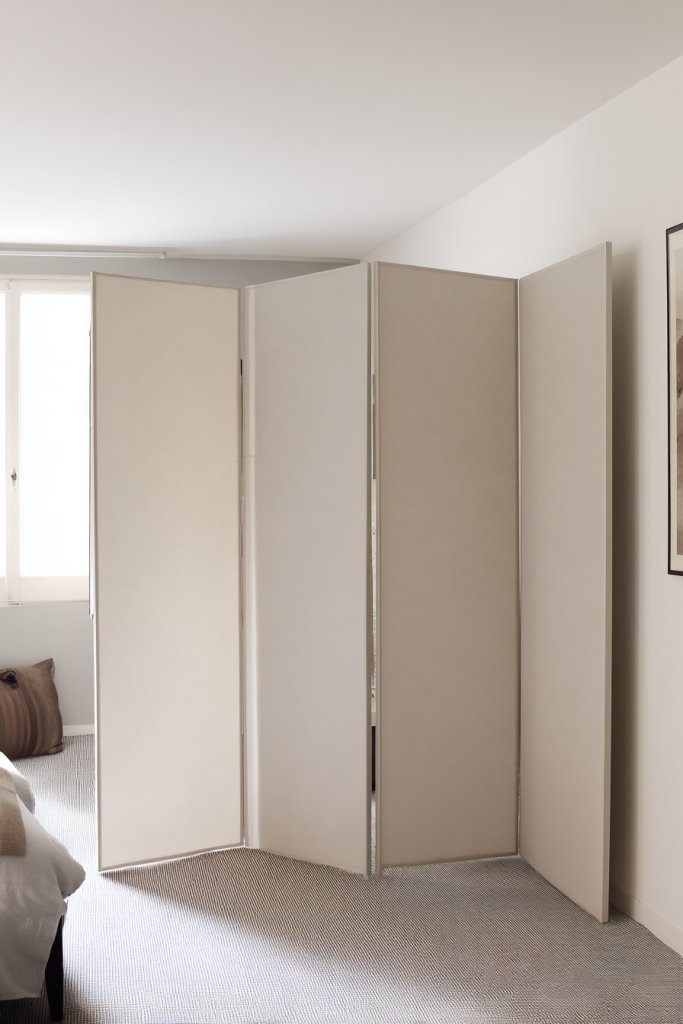
Open floor plans are great, but sometimes you need privacy or separation without building permanent walls. Fixed partitions can feel restrictive and rigid. Movable partitions offer flexible solutions that adapt to your needs, whether you want an open space for entertaining or a private area for work or rest. Who knew that walls could be so versatile?
Picture lightweight screens or panels that slide, fold, or swing to divide a room. They can be made of fabric, wood, or even frosted glass, adding texture and style. When open, they create a seamless flow—when closed, they provide privacy. These partitions can be decorated with patterns, textures, or even artwork, turning them into design features rather than just dividers.
Choose from folding screens, sliding panels, or hanging curtains based on your space and style. For a modern look, opt for sleek, minimal frames or translucent materials. In traditional decor, wooden or fabric partitions with decorative details work well. Use lightweight materials for easy handling, or motorized systems for effortless operation. They can be easily moved or stored when not in use.
Identify the areas where flexibility is needed and select the appropriate partition type. Install tracks or ceiling-mounted systems that allow smooth movement. Choose finishes and materials that match your decor—think textured wood, fabric-covered panels, or glass. Test the partitions for stability and ease of movement before regular use. Consider soundproofing if privacy is a priority.
Decorate the partitions with fabric covers, decals, or textured finishes to match your style. Incorporate pockets or hooks for added functionality. Use lighting—like LED strips or spotlights—to enhance their aesthetic appeal. Personal touches turn these functional elements into focal points and style statements.
Movable partitions give you the freedom to customize your space daily—creating private zones or open areas at will. They add versatility and style without the permanence of walls. Once you see how they transform your home, you’ll wonder how you ever lived without them. Ready to divide and conquer your space? The movable partition is your new best friend.
24. Creating a Visual Continuity with Consistent Flooring
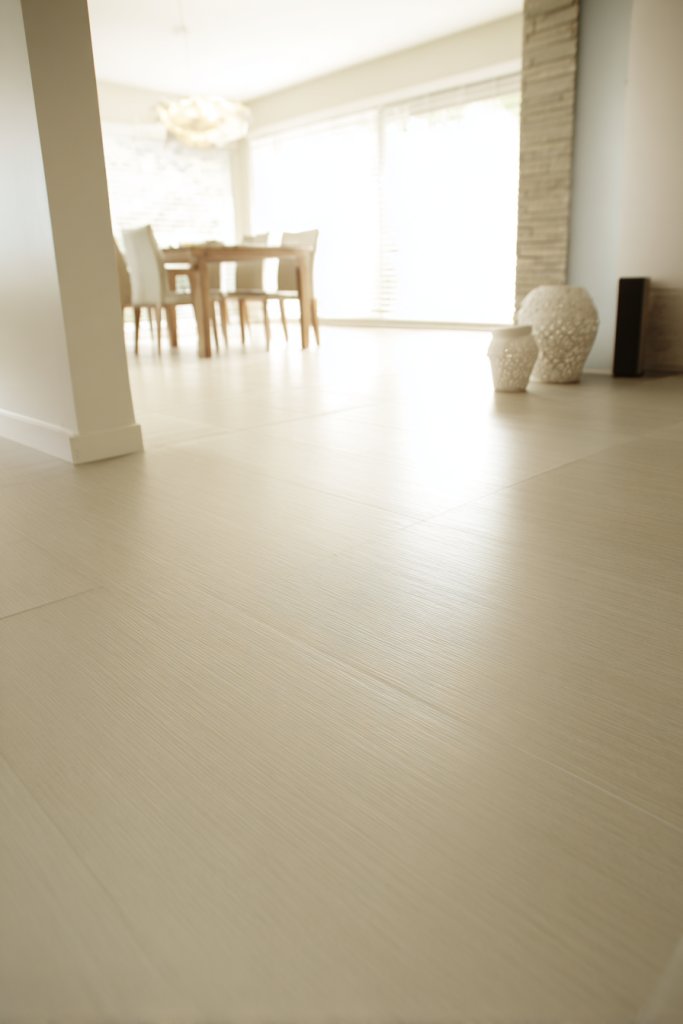
Multiple flooring styles or mismatched materials can make small spaces feel disjointed and smaller. Visual discontinuity breaks the flow, emphasizing boundaries and clutter. Creating a consistent flooring scheme unifies your space, making it look larger, more cohesive, and more elegant. Who knew that flooring choices could have such an impact?
Imagine a continuous, seamless floor stretching from the kitchen to the living room, with the same wood or tile pattern. This visual flow tricks the eye into perceiving a larger, more open space. Subtle color variations or textures can define zones without breaking the visual continuity. It’s like creating an unbroken canvas that makes every inch feel connected and expansive.
Choose flooring materials that suit your decor style—light oak, gray concrete, or sleek porcelain tiles. Use the same flooring throughout main living areas and hallways, and add rugs or area mats to define specific zones subtly. For multi-level spaces, consider flooring with consistent elevation, or use transitions that blend seamlessly. Seasonal or thematic changes can be achieved with decorative rugs that don’t disrupt the flow.
Plan your flooring layout carefully, measuring each room and corridor. Opt for durable, easy-to-maintain materials that match your style—laminate, vinyl, or engineered wood. When installing, ensure tight joints and smooth transitions to avoid visual breaks. Use matching thresholds or transition strips to keep the flow continuous across different rooms. Regular cleaning and maintenance preserve the seamless appearance.
Select rugs or mats that complement your decor, adding color or texture without disrupting visual flow. Incorporate different textures or finishes in specific zones for subtle differentiation. Personalize with decorative borders or inlays that enhance the overall aesthetic. Keep the flooring in pristine condition to maintain the illusion of endless space.
Consistent flooring creates a unified look that visually enlarges your home and simplifies decorating. It’s a simple, yet powerful trick that elevates your interior design instantly. Once you adopt this approach, your home will feel more open, connected, and stylish. Ready to unify your space with seamless flooring? The illusion of size is in your hands.
25. Strategic Placement of Appliances and Fixtures
In small homes, every appliance and fixture counts—poor placement can block pathways, cause clutter, or make daily routines awkward. Thoughtful positioning enhances flow, safety, and efficiency. It’s about working smarter, not harder, with your space. Who wants a kitchen or bathroom that feels cramped and chaotic?
Imagine a galley kitchen where the fridge, stove, and sink form a perfect triangle, reducing unnecessary movement. In bathrooms, placing the toilet and shower away from the door creates a more open feel. Appliances are built into cabinetry or tucked into corners to keep surfaces clear. The overall aesthetic is sleek, functional, and spacious—like a well-orchestrated machine.
Use recessed or built-in appliances to hide bulky elements. Place fixtures at optimal heights for comfort—think wall-mounted faucets or raised outlets. In multi-purpose rooms, choose fold-away or compact appliances that can be concealed when not in use. For seasonal or occasional use, store appliances in closets or storage units to free up space.
Plan your layout carefully, measuring clearances and access routes. Install built-in units or custom cabinetry that fit your appliances precisely. Use outlets, switches, and plumbing that are easily accessible but hidden behind panels. Test the flow and make adjustments for convenience and safety. Regular maintenance keeps everything running smoothly and prevents clutter buildup.
Match appliance finishes with your decor—sleek stainless, matte black, or custom paneling. Use decorative hardware or trim to integrate appliances seamlessly. Incorporate smart technology for remote control or automation, enhancing convenience. Keep countertops clear with wall-mounted storage or under-counter drawers, maintaining a clean, efficient look.
Strategic appliance placement transforms a small home into a well-oiled machine, boosting daily efficiency. It’s a subtle detail that makes your routines smoother and your space more comfortable. Once you master the art of layout, every task becomes easier and more enjoyable. Ready to optimize your home’s flow? The secret is placement, precision, and smart design.
Conclusion
With a diverse range of small house floor plan ideas, you now have plenty of inspiration to create a space that feels spacious, stylish, and tailored to your lifestyle. Don’t hesitate to try out these clever design concepts in your own home and enjoy the benefits of efficient living. Embrace the opportunity to craft a cozy haven where every inch is used with intention and creativity!

Post Comment